
Are you ready to bake something delightful? These Orange Cranberry Scones are easy to make and taste amazing. With zesty orange and tart cranberries, they’re a perfect treat for breakfast or tea time. In this post, I’ll guide you through the simple steps to create these tasty scones and share tips to enhance their flavor. Let’s dive into this delicious recipe that will impress your family and friends!
Why I Love This Recipe
- Bright Flavors: The combination of cranberries and orange zest adds a fresh, vibrant touch to these scones, making them a delightful treat for any occasion.
- Easy to Make: This recipe is quick and simple, allowing even novice bakers to whip up a batch of delicious scones in no time.
- Perfect for Any Meal: These scones can be enjoyed at breakfast, as a snack, or even as a lovely addition to a tea party.
- Customizable: Feel free to experiment with different dried fruits or citrus zests to make these scones your own!
Ingredients
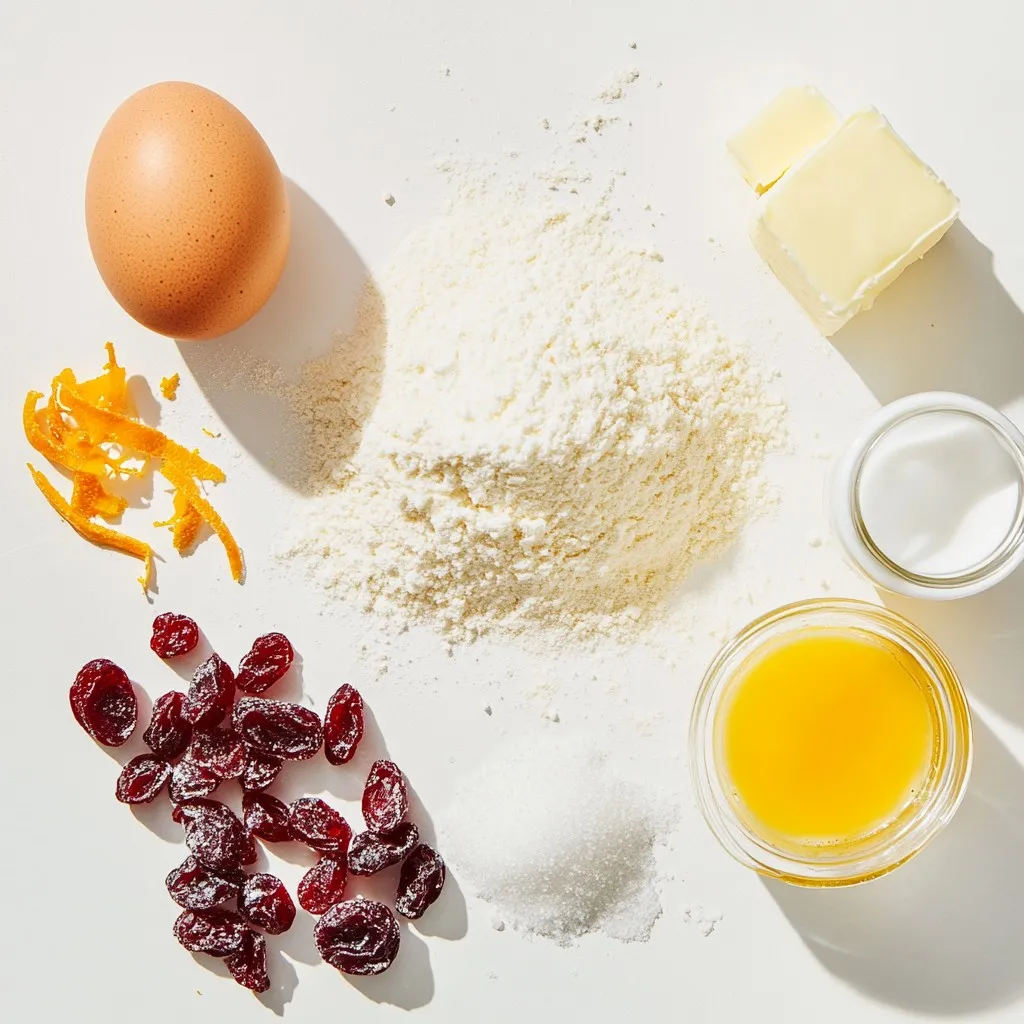
List of Ingredients
– 2 cups all-purpose flour
– 1/3 cup granulated sugar
– 1 tablespoon baking powder
– 1/2 teaspoon salt
– 1/4 cup unsalted butter, cold and cubed
– 1/2 cup dried cranberries
– Zest of 1 orange
– 1/2 cup orange juice (freshly squeezed)
– 1 large egg
– 1 teaspoon vanilla extract
– 1/4 cup heavy cream (for brushing)
– Turbinado sugar (for topping)
Measurement Conversions
If you need different measurements, here are some easy conversions:
– 1 cup = 8 ounces
– 1/2 cup = 4 ounces
– 1 tablespoon = 3 teaspoons
– 1/4 cup = 2 ounces
Ingredient Substitutions
You can swap some ingredients if you need to:
– Use whole wheat flour for a nuttier taste.
– Maple syrup can replace granulated sugar.
– Use coconut oil instead of butter for a dairy-free option.
– Fresh cranberries can work, but chop them smaller and add a little more sugar.
– Lemon juice can replace orange juice if you want a different flavor.
– Any milk can replace heavy cream for brushing the scones.
These options let you personalize your orange cranberry scones. Enjoy experimenting!
Step-by-Step Instructions
Prepping the Dough
First, preheat your oven to 400°F (200°C). Line a baking sheet with parchment paper. This keeps the scones from sticking. In a large bowl, whisk together 2 cups of flour, 1/3 cup of sugar, 1 tablespoon of baking powder, and 1/2 teaspoon of salt. Mix well. Next, add 1/4 cup of cold, cubed butter. Use your fingertips or a pastry cutter to blend the butter into the flour. You want it to look like coarse crumbs. This step is key for a flaky scone. Then, stir in 1/2 cup of dried cranberries and the zest of 1 orange. This adds a lovely flavor.
Forming and Cutting Scones
In a separate bowl, whisk together 1/2 cup of freshly squeezed orange juice, 1 large egg, and 1 teaspoon of vanilla extract. Pour this mixture into the dry ingredients. Gently stir with a fork until just combined. Be careful not to overmix! The dough will be slightly sticky. Turn the dough onto a floured surface. Knead it gently a few times. Shape it into a circle about 1 inch thick. Use a sharp knife or dough cutter to cut this circle into 8 wedges. Place the wedges on the prepared baking sheet.
Baking Instructions
Brush the tops of the scones with 1/4 cup of heavy cream. This will give them a nice golden color. Sprinkle turbinado sugar on top for a crunchy finish. Bake the scones for 15-20 minutes, until they turn golden brown. Keep an eye on them as they bake. Once done, take them out of the oven. Let them cool slightly before serving. Enjoy the delightful smell and taste of your fresh orange cranberry scones!
Tips & Tricks
Achieving the Perfect Scone Texture
To get soft scones, you must mix gently. When you combine the wet and dry ingredients, stop as soon as they blend. If you stir too much, the scones will be tough. Also, use cold butter. Cold butter makes the scones flaky. Cut the butter into small pieces before adding it to the flour. This helps create that nice crumbly texture.
Flavor Enhancements
You can boost flavor with a few simple tricks. Try adding more zest, like lemon or lime, for a tangy kick. You can also mix in nuts like walnuts or pecans for crunch. If you love spices, add a pinch of cinnamon or nutmeg. For a sweeter scone, consider including chocolate chips or a drizzle of honey on top. These small touches make a big difference.
Common Mistakes to Avoid
Avoid overmixing the dough. This is the leading cause of tough scones. Also, don’t skip the chilling step if you want that perfect rise. If your oven is too hot, scones can burn on the outside and stay raw inside. Always check the temperature with an oven thermometer. Lastly, remember to brush the tops with cream before baking. This gives a beautiful golden color.
Pro Tips
- Use Cold Butter: Ensure your butter is cold and cubed to help create the flaky texture that scones are known for.
- Don’t Overmix: Mix the dough until just combined to prevent tough scones; they should be light and tender.
- Brush with Cream: Brushing the tops with heavy cream before baking adds a lovely golden color and richness.
- Flavor Variations: Feel free to experiment with different dried fruits or citrus zests for unique flavor combinations!
Variations
Alternative Fruits and Add-Ins
You can switch up the fruits in your scones. Instead of dried cranberries, try dried cherries or blueberries. Both add a sweet twist. You can also mix in nuts like pecans or walnuts for added crunch. If you want a tropical vibe, consider adding shredded coconut. Just remember to keep the total mix-ins to about 1 cup.
Glaze and Topping Options
A glaze can elevate your scones. Mix powdered sugar with a splash of orange juice for a sweet glaze. Drizzle it over warm scones for a delightful touch. You can also use a simple milk glaze. Just mix milk and powdered sugar until smooth. For a crunchy topping, sprinkle more turbinado sugar before baking. This gives your scones a nice, sweet crust.
Gluten-Free Option
You can make these scones gluten-free easily. Use a gluten-free flour blend instead of all-purpose flour. Many brands work well in baking. Just check they have a good mix of starches and gums. This keeps the scones moist and fluffy. Follow the same steps as in the original recipe, and you’ll have tasty gluten-free scones.
Storage Info
Storing Leftover Scones
To keep your scones fresh, store them in an airtight container. Place parchment paper between layers to prevent sticking. They will stay fresh for about two days at room temperature. If you want to keep them longer, consider freezing.
Freezing Instructions
Freezing scones is simple. Allow them to cool completely. Wrap each scone in plastic wrap, then place them in a freezer bag. They can last up to three months in the freezer. Just remember to label the bag with the date.
Reheating Tips
To reheat scones, preheat your oven to 350°F (175°C). Place the scones on a baking sheet for about 10 minutes. This helps restore their texture. If you prefer, you can also microwave them for about 20 seconds. Enjoy your warm scones again!
FAQs
Can I use fresh cranberries instead of dried?
Yes, you can use fresh cranberries. They add a tart flavor and bright color. If you use fresh cranberries, chop them into smaller pieces. This helps them mix well in the dough. You might want to add a little more sugar. Fresh cranberries are more sour than dried ones.
How do I know when my scones are done baking?
Watch for color and texture. Your scones should be golden brown on top. The edges may look firm. You can also use a toothpick. Insert it into the center of a scone. If it comes out clean, the scones are ready. They will rise and feel slightly firm to touch.
What can I serve with orange cranberry scones?
These scones taste great with various toppings. You can serve them with butter or cream cheese. They pair well with jams, like orange or raspberry. A nice cup of tea or coffee makes a perfect match. For a fun twist, add a drizzle of honey or maple syrup on top. Enjoy them warm for the best taste!
In this post, we covered the key steps to make delicious scones. We explored ingredients, measurements, and substitutes. You learned how to prep the dough, cut the scones, and bake them perfectly. We also shared tips for texture and flavor, plus common mistakes to avoid. With variations for different tastes and storage tips, you are now ready to enjoy fresh scones. Remember, practice makes perfect! Enjoy your baking adventure and the tasty rewards that follo