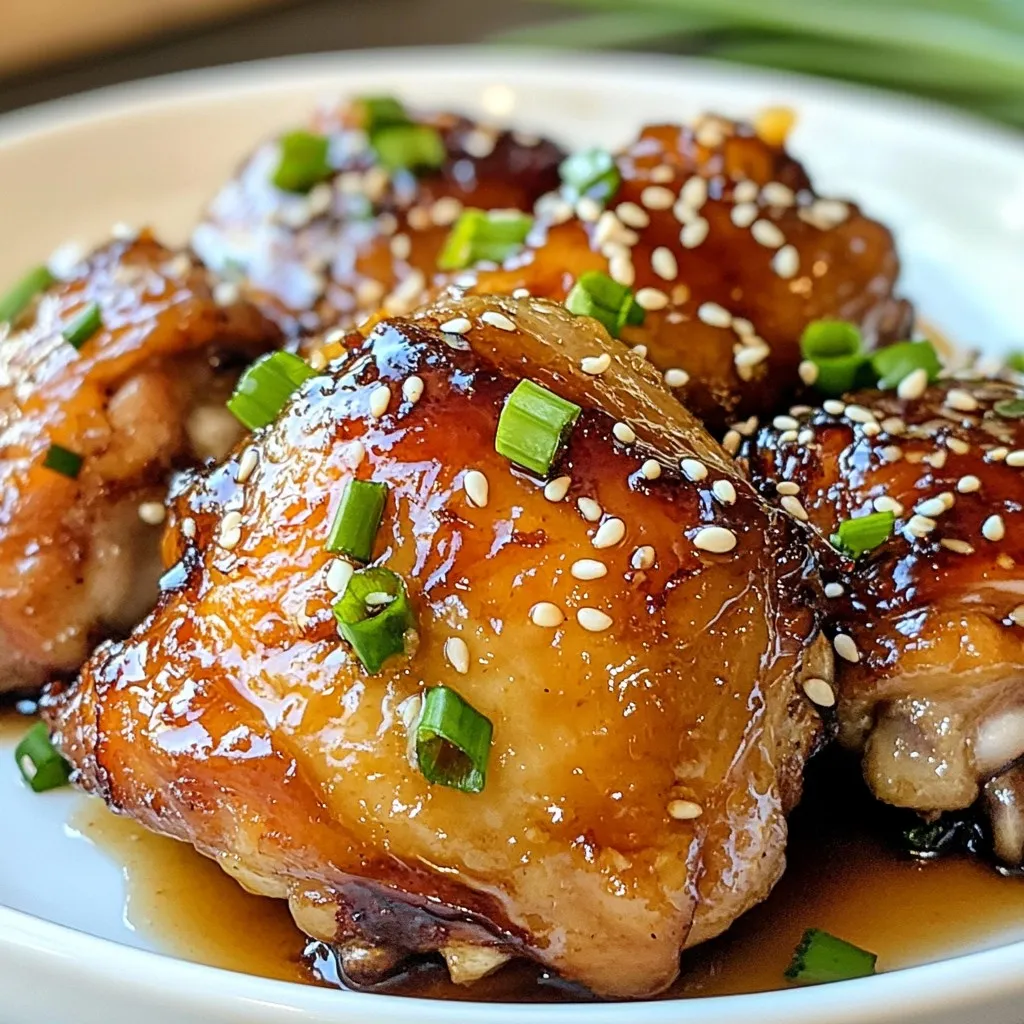
Looking for a tasty dinner idea? Try these Honey Garlic Chicken Thighs! With a sweet and savory sauce, they’re sure to impress your family and friends. I’ll show you how to make juicy, flavorful chicken using simple ingredients. Plus, I’ll share tips for perfect cooking and fun variations. Get ready to enjoy a quick and satisfying meal that’s as easy as it is delicious!
Why I Love This Recipe
- Deliciously Sweet and Savory: The combination of honey and garlic creates a mouthwatering glaze that perfectly complements the chicken.
- Easy to Prepare: This recipe requires minimal prep work and can be made in just one skillet, making cleanup a breeze.
- Perfectly Juicy Chicken: Bone-in, skin-on thighs ensure the chicken stays moist and flavorful throughout the cooking process.
- Versatile Meal: Pair it with rice, salad, or your favorite sides for a complete meal that everyone will love.
Ingredients
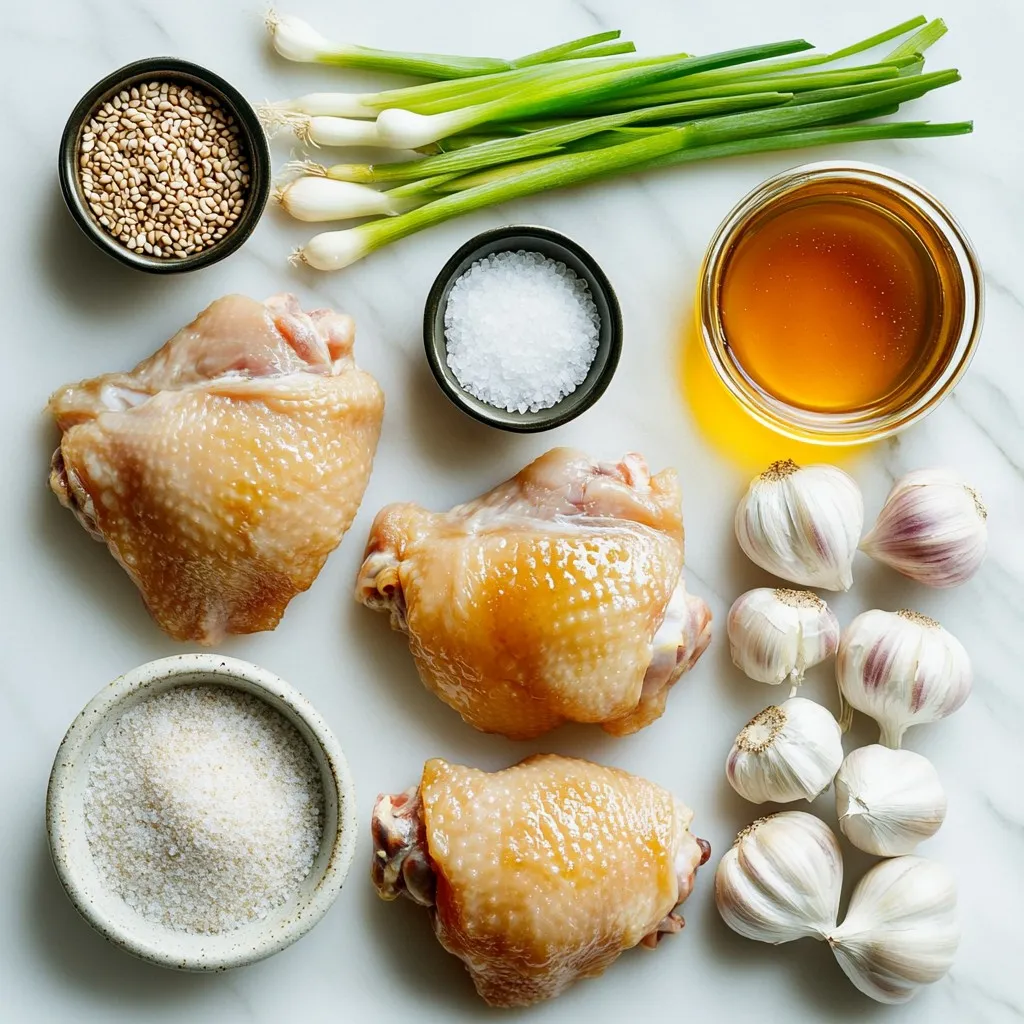
List of Ingredients
– 4 bone-in, skin-on chicken thighs
– 1/4 cup honey
– 4 cloves garlic, minced
– 1/4 cup low-sodium soy sauce
– 1 tablespoon apple cider vinegar
– 1 teaspoon grated fresh ginger
– Salt and pepper to taste
– 2 tablespoons olive oil
– 1 tablespoon sesame seeds (for garnish)
– 2 green onions, sliced (for garnish)
To make honey garlic chicken thighs, gather these simple ingredients. You need four bone-in, skin-on chicken thighs for a juicy bite. Honey adds sweetness and stickiness. Minced garlic gives a great aroma. Low-sodium soy sauce adds depth without too much salt. Apple cider vinegar cuts through the sweetness. Fresh ginger brings warmth and spice. Salt and pepper enhance all the flavors. Olive oil helps with searing the chicken. For garnish, sesame seeds and green onions add a nice touch.
These ingredients come together to create a dish that is sweet, savory, and satisfying. I love how easy it is to find everything at the store. Each item plays a key role in making this meal a hit. Plus, you can tweak the recipe by adding your favorite spices or herbs!
Step-by-Step Instructions
Preparing the Oven and Ingredients
Preheating the Oven
First, turn your oven to 400°F (200°C). This step warms the oven and helps the chicken cook evenly.
Mixing the Honey Garlic Sauce
In a bowl, whisk together the honey, minced garlic, low-sodium soy sauce, apple cider vinegar, and grated ginger. Mix until it’s smooth and well combined. This sauce adds a sweet and savory flavor to the chicken.
Searing the Chicken
Seasoning the Chicken Thighs
Take your chicken thighs and sprinkle salt and pepper on both sides. This step adds flavor and enhances the dish.
Cooking in an Oven-Safe Skillet
Heat olive oil in a large oven-safe skillet over medium-high heat. Once hot, add the chicken thighs skin-side down. Sear them for 5-7 minutes until the skin turns golden brown and crispy. This creates a nice crust and locks in moisture.
Baking the Chicken
Pouring the Sauce
Flip the chicken thighs over. Now, pour the honey garlic sauce over them, making sure they are well coated. This step ensures that every bite is full of flavor.
Baking Time and Temperature
Transfer the skillet to your preheated oven. Bake for 25-30 minutes until the internal temperature reaches 165°F (75°C). The sauce should be bubbly and thickened. Let the chicken rest for 5 minutes before serving, allowing the juices to settle.
Tips & Tricks
Ensuring Perfectly Cooked Chicken
– Checking Internal Temperature
To ensure safe chicken, check the internal temperature. Use a food thermometer. The chicken should reach 165°F (75°C). This means it is cooked and safe to eat. Insert the thermometer into the thickest part of the thigh. This ensures you avoid undercooked chicken.
– Tips for Crispy Skin
Crispy skin makes the dish more tasty. Start by drying the chicken thighs well. Pat them with paper towels before cooking. This removes excess moisture. Heat your skillet until it is hot. Cook the chicken skin-side down first. Searing for 5-7 minutes helps achieve a golden brown finish.
Enhancing the Flavor
– Recommended Seasoning Adjustments
You can adjust the flavor of the sauce. If you like it spicier, add chili flakes. For a sweeter taste, add more honey. Taste the sauce before pouring it on the chicken. This way, you can make it perfect for your taste.
– Using Fresh Ingredients
Fresh ingredients always enhance the dish. Use fresh garlic and ginger for the best flavor. Fresh herbs, like parsley or cilantro, can brighten up the dish. They also add a nice touch when you serve it. Use fresh green onions as a garnish for a pop of color and taste.
Pro Tips
- Use Fresh Garlic: Freshly minced garlic adds a vibrant flavor that enhances the sauce significantly compared to pre-minced options.
- Let It Rest: Allowing the chicken to rest for a few minutes after baking helps retain its juices, making it more tender and flavorful.
- Adjust Sweetness: Feel free to adjust the amount of honey based on your preference for sweetness; you can also add a pinch of red pepper flakes for a spicy kick.
- Garnish Wisely: Fresh toppings like sesame seeds and green onions not only enhance presentation but also add a nice crunch and flavor contrast to the dish.
Variations
Ingredient Swaps
Using Boneless Chicken Thighs
You can swap bone-in chicken thighs for boneless ones. Boneless thighs cook faster. They stay juicy, which is great for quick meals. Just adjust cooking time to about 20-25 minutes. Always check for the right internal temperature.
Gluten-Free Alternatives
If you need a gluten-free dish, use tamari instead of soy sauce. Tamari offers a similar taste without gluten. You can also use coconut aminos for a lighter flavor. This makes the meal safe for those with gluten allergies.
Flavor Additions
Experimenting with Spices
You can spice things up by adding chili flakes. This gives the dish a nice kick. A little goes a long way, so start with a pinch. You can also try smoked paprika for a deeper flavor. It adds a nice warmth to the honey garlic mix.
Adding Vegetables to the Skillet
Try adding veggies to the skillet while cooking. Bell peppers, carrots, or snow peas work well. They add color and nutrients. Just toss them in during the last 15 minutes of baking. This way, they stay crisp and fresh.
Storage Info
How to Store Leftovers
To keep your honey garlic chicken thighs fresh, follow these steps:
– Optimal Storage Conditions: Place the chicken in an airtight container. Make sure the container seals well to keep out air. This will help maintain flavor and moisture.
– Duration for Refrigeration: You can store leftovers in the fridge for up to three days. After that, the chicken may start to lose quality.
Reheating Instructions
To enjoy your chicken again, use these methods:
– Best Methods to Retain Flavor and Texture: The oven works best for reheating. Preheat it to 350°F (175°C). Place the chicken on a baking sheet, cover it with foil, and heat for about 15-20 minutes. This keeps the meat juicy.
– Tips for Quick Reheating: If you need a faster way, use the microwave. Place the chicken on a microwave-safe plate. Cover it with a damp paper towel to keep it moist. Heat for 1-2 minutes, checking often to avoid overcooking.
FAQs
Common Questions
Can I use chicken breasts instead of thighs?
Yes, you can use chicken breasts. They will cook faster but may be less juicy. Chicken thighs have more fat, making them more tender. If you use breasts, reduce the cooking time by about 10 minutes.
What can I serve with honey garlic chicken thighs?
You can serve these chicken thighs with steamed rice or a fresh salad. Roasted vegetables also pair well. You want something that soaks up the tasty sauce!
Cooking-Related Questions
How long can I marinate the chicken?
You can marinate the chicken for up to 2 hours. This will help the flavors soak in. If you have more time, you can marinate overnight in the fridge.
Can I freeze honey garlic chicken thighs?
Yes, you can freeze the cooked chicken thighs. Make sure to let them cool first. Place them in an airtight container or freezer bag. They will last for about 3 months. Just thaw in the fridge before reheating.
You learned how to make delicious honey garlic chicken thighs. We covered the key ingredients, step-by-step cooking, and helpful tips. Remember to use fresh items and check the chicken’s temperature for safety. Feel free to tweak the recipe with swaps or spice additions that you like. Store your leftovers properly to enjoy them later. Cooking can be fun and rewarding, so try this dish and share it with friends. Enjoy your tasty creatio