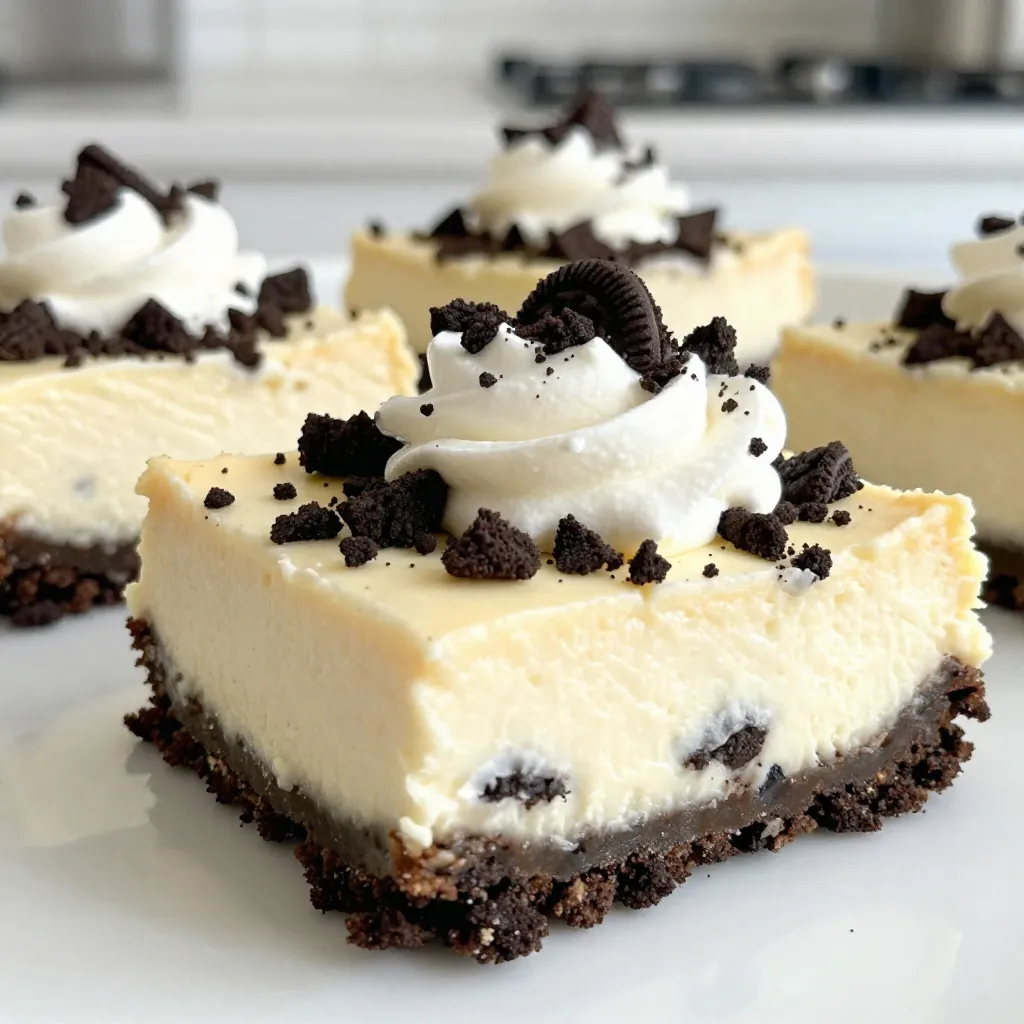
Looking for the perfect dessert that blends rich creaminess with crunchy cookies? You’ve found your answer! My Cookies and Cream Cheesecake Bars are a delicious blend of smooth cheesecake and Oreo goodness. With easy steps and simple ingredients, you can impress family and friends in no time. Let’s dive into this tasty treat that satisfies every sweet tooth! Get ready to bake happiness into your kitchen.
Why I Love This Recipe
- Decadent Flavor: The combination of creamy cheesecake and crunchy Oreo cookies creates a rich and indulgent dessert that satisfies any sweet tooth.
- Easy to Make: This recipe requires simple ingredients and straightforward steps, making it accessible for bakers of all skill levels.
- Perfect for Sharing: Cut into bars, these cheesecake treats are easy to serve at parties, potlucks, or family gatherings.
- Customizable: Add your twist by incorporating different toppings or mix-ins, like chocolate chips or caramel sauce, to make it your own!
Ingredients
Main Ingredients
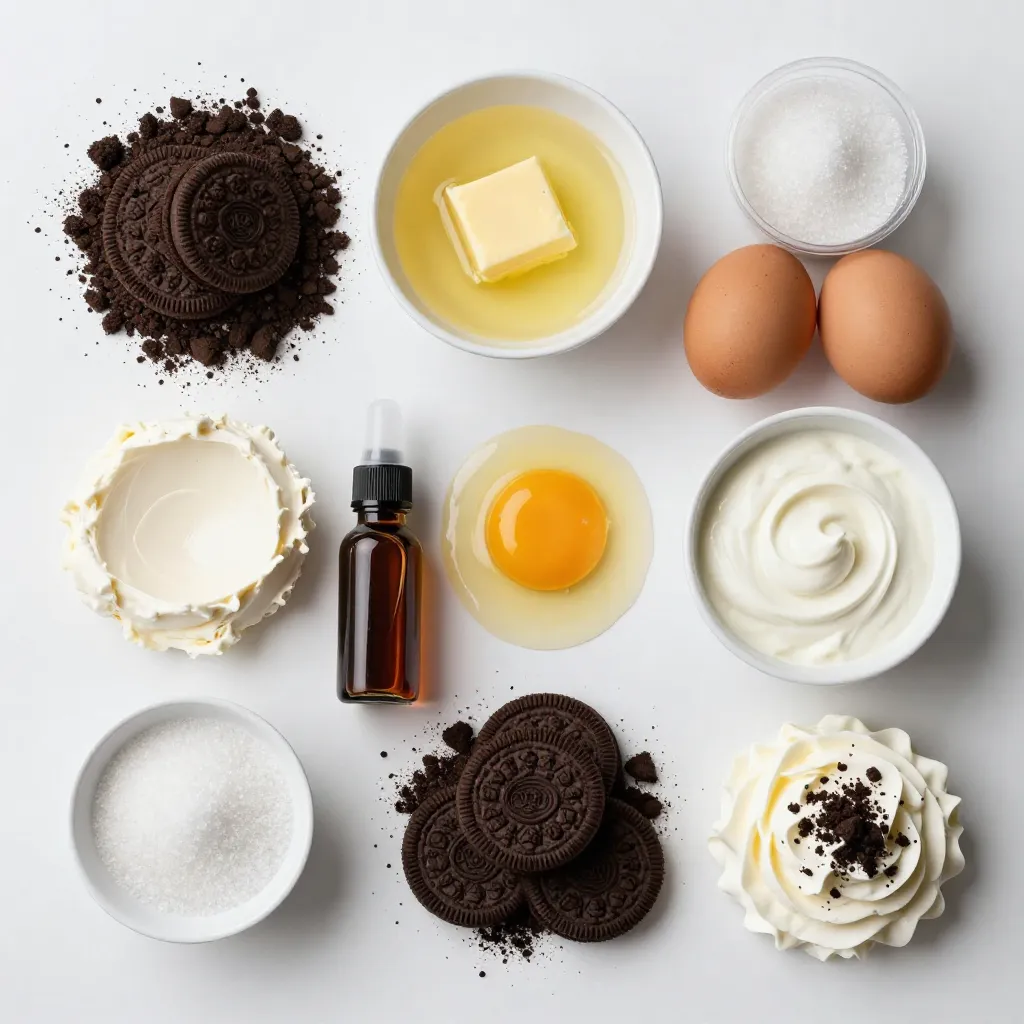
– 1 ½ cups Oreo cookie crumbs
– ½ cup unsalted butter
– 16 oz cream cheese
– ¾ cup granulated sugar
– 2 large eggs
– 1 teaspoon vanilla extract
– 1 cup sour cream
– 1 cup crushed Oreo cookies
– Whipped cream for garnish
– Extra crushed Oreos for topping
These ingredients are key to making your cookies and cream cheesecake bars. The Oreo cookie crumbs form a tasty crust, giving the bars a rich chocolate flavor. The unsalted butter helps bind the crumbs together, creating a firm base. Cream cheese is essential for the creamy filling. It gives the bars their smooth texture and rich taste. Granulated sugar sweetens the filling, balancing the flavors perfectly.
The eggs help the cheesecake set. They add a nice structure to the bars. Vanilla extract enhances the flavor, making it more delicious. Sour cream adds a slight tang, which complements the sweetness. Crushed Oreo cookies mixed into the filling give the bars that classic cookies and cream taste. Finally, whipped cream and extra crushed Oreos are perfect for garnishing. They make the bars look even more tempting and fun to eat.
When you gather these ingredients, you prepare to make a dessert that everyone will love. The combination is simple yet effective, creating a treat that is sure to impress.
Step-by-Step Instructions
Preparation
1. First, preheat your oven to 325°F (163°C).
2. Line an 8×8-inch baking pan with parchment paper. Leave some paper hanging over the edges. This makes it easy to lift the bars out later.
3. In a medium bowl, combine 1 ½ cups of Oreo cookie crumbs with ½ cup of melted unsalted butter. Mix until it looks like wet sand.
4. Press this mixture firmly into the bottom of the pan to form a crust.
5. Bake the crust for 10 minutes. After baking, let it cool while you make the filling.
Cheesecake Filling
1. In a large bowl, beat 16 oz of softened cream cheese with a mixer until smooth. This takes about 2-3 minutes.
2. Add ¾ cup of granulated sugar and mix until fluffy.
3. Add 2 large eggs, one at a time, mixing well each time.
4. Stir in 1 teaspoon of vanilla extract and 1 cup of sour cream until everything is smooth.
5. Gently fold in 1 cup of crushed Oreo cookies. This gives the filling a nice texture.
Baking and Cooling
1. Pour the cheesecake filling over the cooled crust in the pan. Spread it evenly with a spatula.
2. Bake for 30-35 minutes. The edges should be set, and the center may be a little jiggly.
3. Turn off the oven but leave the bars inside for another 10 minutes. This helps them cool slowly.
4. Once you take them out, let the bars cool at room temperature.
5. After cooling, refrigerate for at least 4 hours, or overnight. This helps the bars set properly.
6. When chilled, lift the cheesecake out of the pan using the parchment paper. Cut into bars. You can add whipped cream and extra crushed Oreos on top if you want.
Tips & Tricks
Perfecting the Cheesecake Bars
To ensure a smooth batter, start with softened cream cheese. Cold cream cheese can cause lumps. Beat it on medium speed until creamy and fluffy. This step is key for a perfect texture.
For a good crust, mix Oreo cookie crumbs with melted butter. Press the mixture evenly into the pan. Bake it for ten minutes to set. Let it cool completely before adding the filling. This keeps the crust from becoming soggy.
Baking time adjustments matter. If you notice the edges are set but the center jiggles slightly, it’s done. Don’t overbake. The bars will firm up as they cool.
Serving Suggestions
Garnishing ideas can elevate your dessert. Top the bars with whipped cream and extra crushed Oreos. This adds a nice touch to the look and taste. You can also drizzle chocolate sauce for an extra treat.
Pairing with drinks is fun! A glass of cold milk goes well with these bars. If you prefer coffee, a rich brew complements the flavors nicely. You can even serve them with a scoop of vanilla ice cream.
Common Mistakes to Avoid
Overmixing the batter can lead to cracks in your cheesecake bars. Mix just until ingredients combine. This keeps the texture smooth and prevents air bubbles.
Not cooling properly can ruin your dessert. After baking, let the bars cool at room temperature. Then, refrigerate them for at least four hours. This helps the bars set and makes them easier to cut.
Pro Tips
- Use Room Temperature Ingredients: Allow your cream cheese and eggs to come to room temperature before mixing. This ensures a smoother batter and helps prevent lumps.
- Don’t Overmix: Once you add the eggs, mix just until combined. Overmixing can introduce too much air, causing the cheesecake to crack as it bakes.
- Cool Gradually: After baking, let the cheesecake bars cool in the oven with the door slightly ajar. This gradual cooling helps prevent cracks on the surface.
- Chill Overnight: For the best texture and flavor, refrigerate the cheesecake bars overnight before serving. This allows the flavors to meld and the bars to set properly.
Variations
Flavor Variations
You can change the flavor of your cheesecake bars by using different cookies. Try using chocolate chip cookies or peanut butter cookies for a twist. Each cookie brings a unique taste. You can also use flavored cream cheese. Options like strawberry or chocolate cream cheese add a fun twist.
Dietary Alternatives
If you need gluten-free options, use gluten-free cookies for the crust. They work just like regular cookies. For dairy-free substitutes, try a dairy-free cream cheese. These swaps keep your bars creamy and delicious.
Different Sizes and Shapes
You can make mini cheesecake bars too! Just use a mini muffin tin instead of a baking pan. This makes perfect bite-sized treats. If you want to make a larger batch, double the recipe. Use a bigger pan and adjust the baking time. Check for the same jiggly center to know when they are done.
Storage Info
How to Store
To keep your cookies and cream cheesecake bars fresh, follow these tips:
– Refrigeration: Place the bars in an airtight container. This helps keep them moist and free from odors. Store them in the fridge for the best taste.
– Freezing: You can freeze these bars too! Cut them into squares first. Wrap each piece tightly in plastic wrap, then place them in a freezer bag. This keeps them fresh for later.
Shelf Life
These bars last quite a while if stored correctly.
– How long the bars last: In the fridge, they are good for about 5-7 days. If frozen, they can last up to 2-3 months.
– Signs of spoilage: Watch for changes in smell, color, or texture. If the bars look dry or have an off smell, it’s best to toss them. Always check before you eat!
FAQs
Can I use different cookies for the crust?
Yes, you can use different cookies for the crust. Try graham crackers or chocolate cookies. Each type gives a unique flavor. Just make sure to crush them into fine crumbs. Mix them with melted butter like you would with Oreos. You can still enjoy that tasty cheesecake vibe!
How do I know when the cheesecake is done?
Check the edges of the cheesecake for firmness. The center should still be a bit jiggly. This is normal. After baking, leave the cheesecake in the oven for 10 more minutes. This helps it set without cracking.
Can I make these cheesecake bars ahead of time?
Absolutely! You can prepare these cheesecake bars one or two days in advance. Just store them in the fridge. They taste even better after chilling overnight. This allows the flavors to develop fully.
– Feel free to ask about other variations or tips! Want to add fruit or change the topping? Just let your creativity shine!
This blog post covered how to make delicious Oreo cheesecake bars. We explored ingredients, step-by-step instructions, tips for perfection, and variations for dietary needs. You now know how to store these treats and the common mistakes to avoid.
Enjoy sharing these creamy, cookie-filled bars with friends and family. Experiment with flavors and get creative. You’ll impress everyone with your baking skills. Have fun, and happy bakin