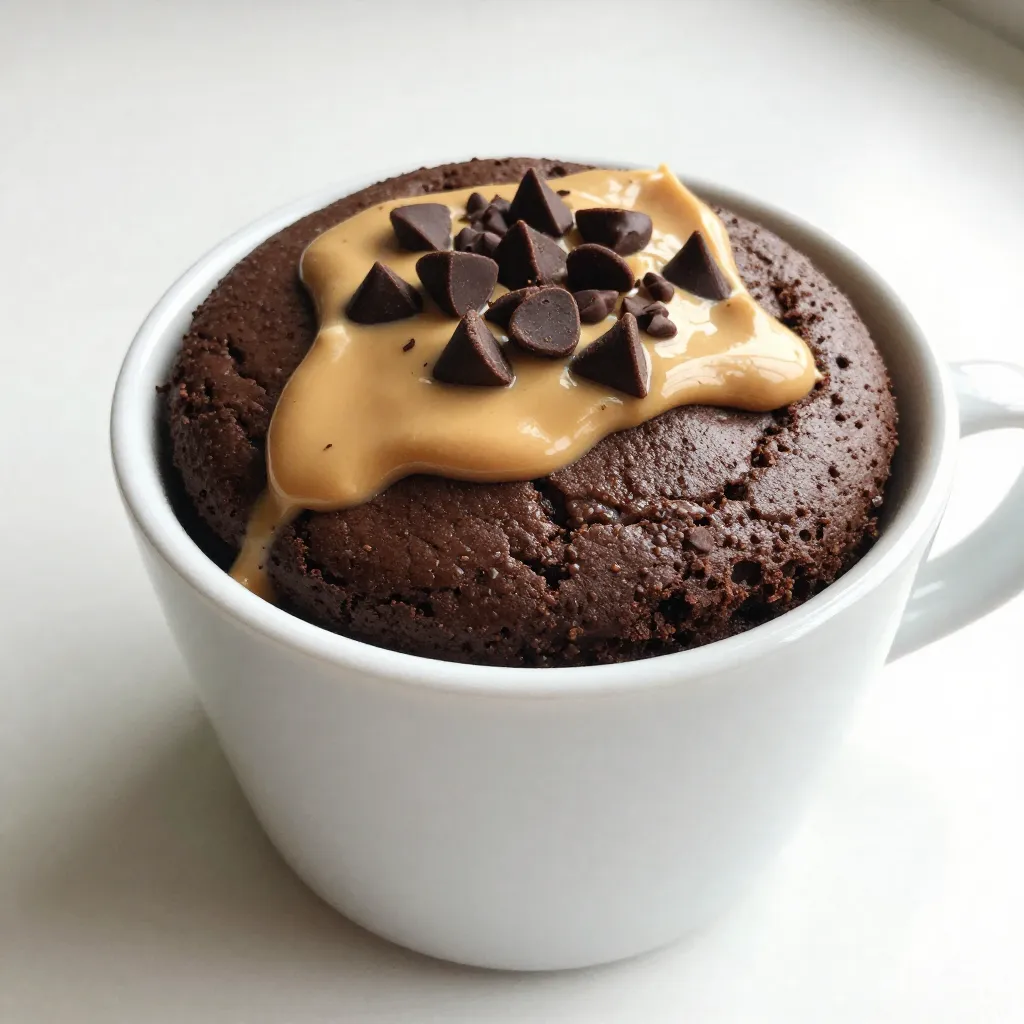
Craving a sweet fix that’s quick and easy? Then you’ll love this Chocolate Peanut Butter Mug Cake! It’s a delightful treat you can whip up in just minutes. With simple ingredients and easy steps, you’ll be enjoying warm chocolatey goodness in no time. Whether you’re a beginner or a pro in the kitchen, this recipe will satisfy your sweet tooth. Get ready to make mug cake magic happen!
Why I Love This Recipe
- Quick and Easy: This mug cake comes together in just a few minutes, making it perfect for a quick dessert fix.
- Decadent Flavor: The combination of chocolate and peanut butter creates a rich and indulgent taste that satisfies sweet cravings.
- Customizable: You can easily adjust the recipe by adding your favorite toppings or mix-ins, like nuts or additional chocolate chips.
- No Special Equipment Needed: All you need is a microwave and a mug, making this recipe accessible for anyone.
Ingredients
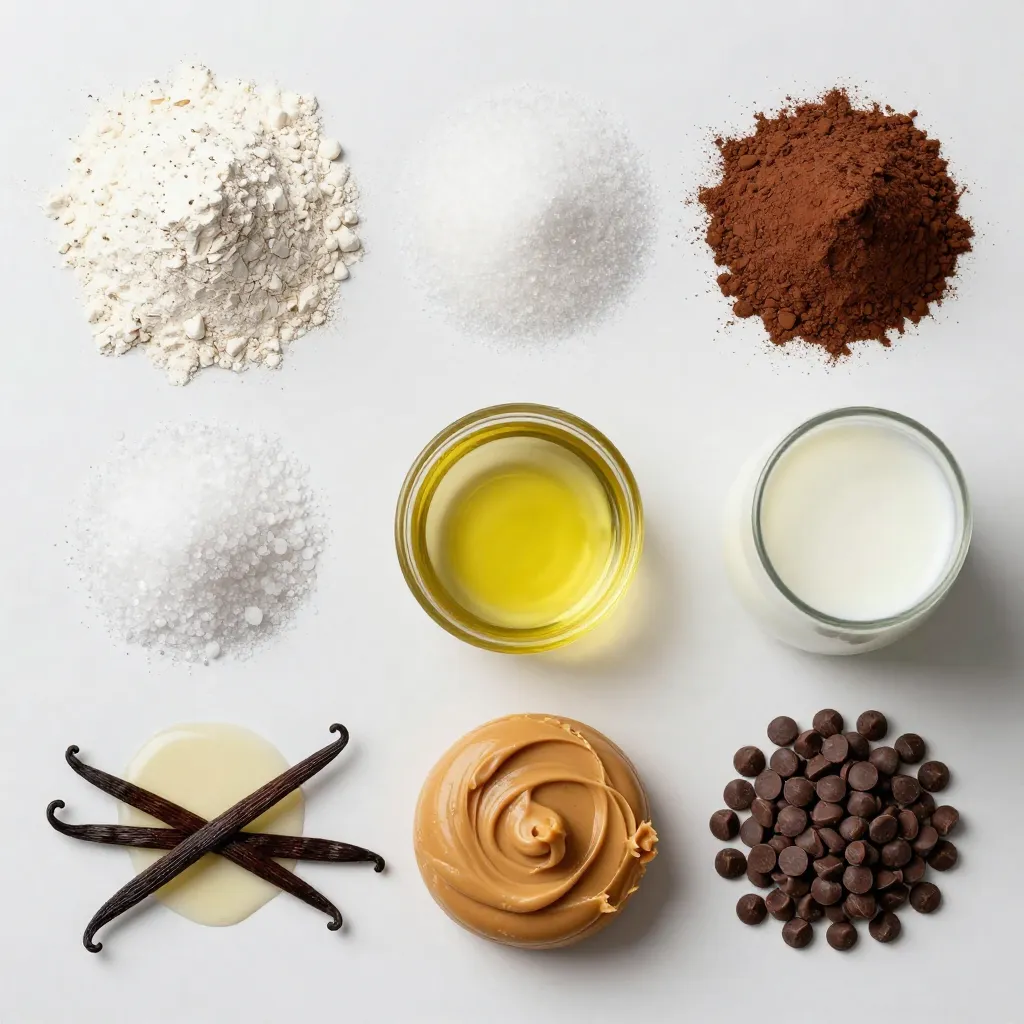
Complete List of Ingredients
– 4 tablespoons all-purpose flour
– 4 tablespoons granulated sugar
– 2 tablespoons unsweetened cocoa powder
– 1/8 teaspoon baking powder
– 1/8 teaspoon salt
– 3 tablespoons milk (or non-dairy milk)
– 2 tablespoons peanut butter (creamy or crunchy)
– 1 tablespoon vegetable oil
– 1/4 teaspoon vanilla extract
– 1 tablespoon chocolate chips (optional)
To make a great chocolate peanut butter mug cake, gather your ingredients. Start with all-purpose flour. This flour gives the cake its structure. You also need granulated sugar for sweetness. Unsweetened cocoa powder adds rich chocolate flavor.
Baking powder helps the cake rise. Don’t forget the salt; it enhances all the flavors. For the liquid, use milk, or pick a non-dairy option like almond or oat milk. Peanut butter is key. You can use creamy or crunchy, depending on your taste.
Add vegetable oil to keep the cake moist. A splash of vanilla extract brings warmth to the flavor. If you love extra chocolate, include chocolate chips for a melty treat.
With these ingredients, you’re ready to create a delicious mug cake that’s quick and easy. It takes just a few minutes to prepare and cook. Enjoy the delightful mix of chocolate and peanut butter in every bite!
Step-by-Step Instructions
Preparing the Dry Ingredients
Start by taking a microwave-safe mug. Add 4 tablespoons of all-purpose flour. Next, mix in 4 tablespoons of granulated sugar. Then, add 2 tablespoons of unsweetened cocoa powder. Sprinkle in 1/8 teaspoon of baking powder and 1/8 teaspoon of salt. Use a fork or spoon to stir everything well. Make sure there are no lumps in the mixture. This step is key for a smooth cake.
Combining Wet Ingredients
Now, it’s time to add the wet ingredients. Pour in 3 tablespoons of milk or your choice of non-dairy milk. Next, add 2 tablespoons of peanut butter. You can use either creamy or crunchy peanut butter, depending on your taste. Then, add 1 tablespoon of vegetable oil and 1/4 teaspoon of vanilla extract. Stir everything together until it’s smooth. If you love chocolate, fold in 1 tablespoon of chocolate chips for extra sweetness.
Cooking the Mug Cake
Place the mug in the microwave. Cook it on high for about 30 to 40 seconds. Keep an eye on it while it cooks. Every microwave is different, and cooking times can change. You want the cake to rise and be set in the middle. Be careful not to overcook it. The cake will keep cooking a bit more after you take it out. After cooking, let it cool for about a minute. Enjoy your delicious mug cake!
Tips & Tricks
Achieving the Perfect Texture
To make your mug cake smooth, mix the dry ingredients well. Use a fork to break any lumps in the flour, sugar, and cocoa. When you add the wet ingredients, stir until the batter is even. A smooth batter gives you that perfect texture. If you find lumps, your cake may bake unevenly.
Customizing Your Mug Cake
You can adjust the sweetness of your cake easily. If you like it sweeter, add more sugar. You can also try different flavors. For a twist, mix in some cinnamon or swap out the peanut butter for almond butter. You might even add a splash of coffee for a rich taste. Feel free to get creative with toppings too!
Microwave Tips
Microwaves are not all the same. Some cook faster than others. If your microwave is more powerful, your cake might need less time. Start with 30 seconds, then check it. If it’s not done, add 5-second bursts until it rises and sets. This will help prevent overcooking. Remember, the cake will keep cooking a little after you take it out.
Pro Tips
- Use Room Temperature Ingredients: Make sure your milk and peanut butter are at room temperature for a smoother batter and better mixing.
- Microwave Power Variations: Keep an eye on your mug cake while cooking, as microwaves can vary in power. Start with 30 seconds and add more time if needed.
- Customize Your Toppings: Feel free to get creative with toppings! Add whipped cream, crushed nuts, or a scoop of ice cream for a delightful twist.
- Experiment with Flavors: Try adding a pinch of cinnamon or a splash of coffee to enhance the chocolate and peanut butter flavors.
Variations
Nut-Free Version
If you want a nut-free treat, you can swap the peanut butter. Sunflower seed butter works well and gives a nice flavor. You can also use soy nut butter. Both options keep the cake moist and tasty without any nuts.
Gluten-Free Option
To make this mug cake gluten-free, just change the flour. Use a gluten-free all-purpose flour blend instead. This blend often has a mix of flours and starches. It mimics regular flour well. Make sure it has a binding agent, like xanthan gum, for the best texture.
Flavor Combinations
You can add extra fun with flavors! Try mixing in mashed bananas for a fruity twist. Chopped nuts add crunch and taste. You can also throw in a dash of cinnamon for warmth. Each addition can change the cake’s taste and make it your own.
Storage Info
Storing Leftover Mug Cake
If you have leftover mug cake, you can store it easily. Let the cake cool completely. Then, cover it with plastic wrap or put it in a sealed container. It will stay fresh for up to two days at room temperature. If you want to reheat it, place it back in the microwave for 10 to 15 seconds. Be careful not to overheat it, or it may dry out.
Freezing Options
Yes, you can freeze a mug cake! To do this, first, let it cool down. After it cools, wrap the mug cake tightly in plastic wrap. Then, place it in an airtight container or a freezer bag. It can last for about a month in the freezer. When you are ready to enjoy it, thaw it in the fridge overnight. Reheat it in the microwave for a few seconds to bring back its soft texture.
Best Serving Practices
To serve your mug cake, I recommend adding a special touch. You can top it with a drizzle of peanut butter or a sprinkle of chocolate chips. A scoop of ice cream pairs well, too! Serve it warm for the best flavor. You can also enjoy it with a side of fresh fruit for a nice contrast.
FAQs
Can I make this mug cake without eggs?
Yes, you can! Use a simple substitute to keep your mug cake moist. Try one of these options:
– 1/4 cup unsweetened applesauce
– 1/4 mashed banana
– 1 tablespoon ground flaxseed mixed with 2.5 tablespoons water
These substitutes work well and keep the cake tasty.
Is it possible to double the recipe?
Absolutely! If you want to make two mug cakes, just double each ingredient. Use two mugs and mix the batter in separate mugs. Microwave each mug for the same time. Check for doneness as they cook.
How long will microwave times vary?
Microwave times can change based on your machine. Most microwaves need about 30 to 40 seconds. Some might need more or less time. It is best to watch the mug cake as it cooks. If it starts to rise and set, it is almost done.
This blog post outlined how to make a delicious mug cake. We covered the key ingredients, step-by-step instructions, and helpful tips. I shared variations for nut-free and gluten-free options, and gave advice on storage and reheating. Remember, you can customize flavors to fit your taste. Making mug cakes is quick and fun. Enjoy your treat and get creative with it! Your next dessert adventure starts with just a few ingredients and your microwav