Get ready to indulge in fall flavors with my easy Chocolate Chip Pumpkin Muffins recipe! This delightful treat combines rich pumpkin and sweet chocolate chips, perfect for breakfast or a snack. In this article, I’ll guide you through the simple steps, ingredient swaps, and expert tips to create muffins that everyone will love. Let’s dive into the world of baking and enjoy these warm, cozy delights together!
Why I Love This Recipe
- Delicious Flavor Combination: The blend of pumpkin and chocolate creates a delightful contrast that is both comforting and indulgent.
- Seasonal Favorite: These muffins perfectly capture the essence of fall with warm spices and pumpkin, making them ideal for autumn gatherings.
- Easy to Make: This recipe comes together quickly, making it perfect for busy mornings or spontaneous baking sessions.
- Customizable: Feel free to add your favorite mix-ins like nuts or dried fruits, allowing you to personalize these muffins to your taste.
Ingredients
List of Ingredients
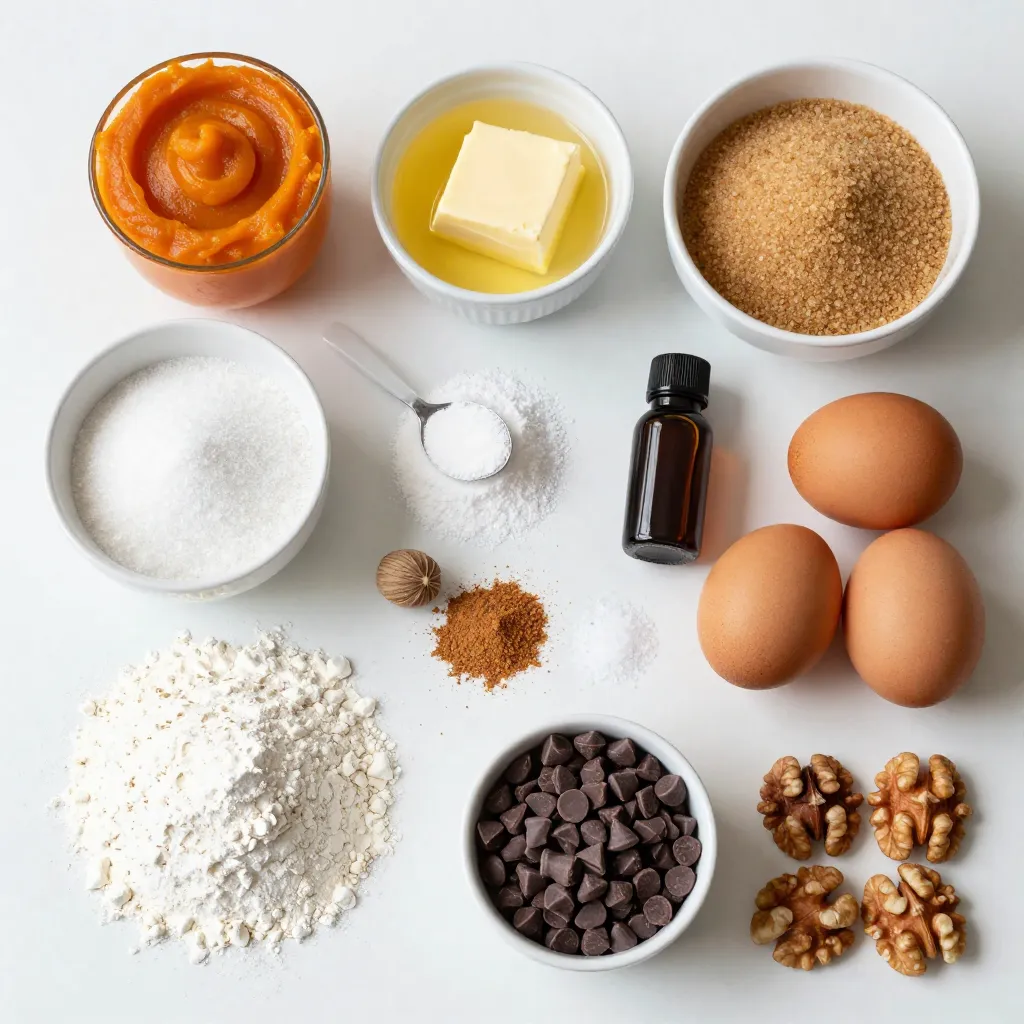
To make the best chocolate chip pumpkin muffins, gather these tasty items:
– 1 cup canned pumpkin puree
– 1/2 cup unsalted butter, melted
– 1 cup brown sugar
– 1/2 cup granulated sugar
– 2 large eggs
– 1 teaspoon vanilla extract
– 1 1/2 cups all-purpose flour
– 1 teaspoon baking soda
– 1 teaspoon baking powder
– 1 teaspoon ground cinnamon
– 1/2 teaspoon ground nutmeg
– 1/4 teaspoon salt
– 1 cup chocolate chips (semi-sweet or milk chocolate)
– 1/2 cup chopped walnuts (optional)
Measurement Conversions
Sometimes, you might want to switch up measurements. Here are some common conversions:
– 1 cup = 16 tablespoons
– 1/2 cup = 8 tablespoons
– 1 teaspoon = 5 milliliters
– 1 tablespoon = 15 milliliters
Using these conversions can help if you need to adjust portions or use different measuring tools.
Ingredient Substitutions
If you run out of an ingredient, no worries! Here are some easy swaps:
– Canned pumpkin puree: You can use fresh pumpkin puree or mashed sweet potatoes.
– Unsalted butter: Use coconut oil or vegetable oil for a dairy-free option.
– Granulated sugar: Try using honey or maple syrup, but adjust the liquid in the recipe.
– All-purpose flour: Substitute with almond flour or gluten-free flour for a gluten-free version.
– Chocolate chips: Use dark chocolate chips, white chocolate, or even dried fruit for a twist.
These substitutions can help you customize the muffins to your taste or dietary needs.
Step-by-Step Instructions
Prepping the Oven and Muffin Tin
First, preheat your oven to 350°F (175°C). This heat makes the muffins rise well. Next, line your muffin tin with paper liners. If you don’t have liners, lightly grease the tin with butter or cooking spray. This step keeps the muffins from sticking.
Mixing Wet Ingredients
In a large bowl, take 1 cup of canned pumpkin puree. Add 1/2 cup of melted unsalted butter, 1 cup of brown sugar, and 1/2 cup of granulated sugar. Whisk these together until they are smooth. Next, crack in 2 large eggs, one at a time. Mix well after each egg. Finally, stir in 1 teaspoon of vanilla extract for extra flavor.
Combining Dry Ingredients
In a separate bowl, sift together 1 1/2 cups of all-purpose flour, 1 teaspoon of baking soda, 1 teaspoon of baking powder, 1 teaspoon of ground cinnamon, 1/2 teaspoon of ground nutmeg, and 1/4 teaspoon of salt. Sifting helps blend the ingredients well. This mix adds a nice rise and flavor to your muffins.
Folding the Batter
Now, gradually add the dry mix to the wet ingredients. Use a spatula to fold until just combined. Be careful not to overmix, as this can make your muffins tough. Gently fold in 1 cup of chocolate chips and 1/2 cup of chopped walnuts, if you like. This adds a tasty crunch.
Baking Process
Spoon the batter into your prepared muffin cups. Fill each cup about 3/4 full to allow space for rising. Place the muffin tin in the oven and bake for 18-20 minutes. To check for doneness, insert a toothpick into the center. If it comes out clean, your muffins are ready.
Cooling Steps
After baking, let the muffins cool in the tin for about 5 minutes. This step helps them firm up. Then, transfer them to a wire rack to cool completely. Enjoy them warm or at room temperature!
Tips & Tricks
Perfecting Muffin Texture
To get soft and fluffy muffins, you need the right balance of wet and dry. The canned pumpkin puree gives moisture and flavor, while the butter adds richness. Use both brown and granulated sugar for sweetness and depth. This mix helps create a tender crumb.
Avoiding Overmixing
Overmixing is a common mistake. It makes muffins tough instead of light. When you combine the wet and dry ingredients, mix until just combined. A few lumps are okay. Gently fold in the chocolate chips and walnuts, if you choose to add them.
How to Store Muffins
Let your muffins cool completely on a wire rack. Store them in an airtight container at room temperature for up to three days. For longer storage, freeze them in a zip-top bag. Just reheat them in the oven or microwave when you want a warm treat.
Pro Tips
- Use Fresh Spices: For the best flavor, use freshly ground spices like cinnamon and nutmeg instead of pre-ground. This will enhance the aroma and taste of your muffins.
- Check Doneness Carefully: To avoid overbaking, check your muffins a minute or two before the suggested time. A toothpick should come out with a few moist crumbs, not wet batter.
- Substitute for Health: You can substitute half of the all-purpose flour with whole wheat flour for a healthier option without compromising taste.
- Storage Tips: Store leftover muffins in an airtight container at room temperature for up to 3 days, or freeze them for longer storage. Just reheat in the oven for a warm treat!
Variations
Dairy-Free Version
You can easily make these muffins dairy-free. Substitute the unsalted butter with coconut oil or a dairy-free margarine. Use almond milk or oat milk instead of any dairy milk if a recipe calls for it. The muffins will still taste amazing and moist.
Add-ins and Flavor Boosts
Want to add more flavors? Here are some great ideas:
– Chopped nuts: Walnuts or pecans add a nice crunch.
– Dried fruit: Raisins or cranberries bring in sweetness.
– Spices: Try adding ginger or cloves for a spicy kick.
– Zest: A little orange or lemon zest brightens the flavors.
Feel free to mix and match these add-ins to suit your taste.
Seasonal Variations
You can change these muffins for different seasons. In the fall, add some apple chunks for a harvest twist. In winter, sprinkle in some peppermint chips for a festive treat. For spring, consider adding fresh berries like blueberries or strawberries. Each season brings fresh flavors to enjoy!
Storage Info
Short-term Storage Tips
To keep your chocolate chip pumpkin muffins fresh, store them in an airtight container. They stay best at room temperature for up to three days. If you want them to last longer, place them in the fridge. Just remember, they may dry out a bit in the fridge.
Freezing Muffins
You can freeze these muffins for later enjoyment. First, let them cool completely. Wrap each muffin in plastic wrap tightly. Then, place them in a freezer bag or container. They can stay in the freezer for up to three months. When you are ready to eat, just take them out and thaw.
Reheating Instructions
To enjoy your muffins warm, preheat your oven to 350°F (175°C). Place the muffins on a baking sheet and heat for about 5 to 10 minutes. If you prefer the microwave, heat each muffin for about 15 to 20 seconds. This keeps them soft and tasty!
FAQs
Can I use fresh pumpkin instead of canned?
Yes, you can use fresh pumpkin. Start by roasting a small pumpkin. Cut it in half, scoop out the seeds, and place it cut-side down on a baking sheet. Roast it at 350°F for about 45 minutes, or until soft. Once cool, scoop the flesh and mash it until smooth. This fresh puree gives a nice taste, but it may add a bit more moisture. You might need to adjust the flour slightly to balance the texture.
What can I substitute for butter?
If you need a butter substitute, try using coconut oil. Melt the coconut oil and use the same amount as the butter. You can also use applesauce for a healthier option. Use half the amount of applesauce compared to butter. This swap reduces fat and adds a bit of sweetness.
How can I make these muffins gluten-free?
To make gluten-free muffins, replace the all-purpose flour with a gluten-free flour blend. Look for a blend that works well for baking, like one with xanthan gum. You might also use almond flour or oat flour, but adjust the liquid as needed. Gluten-free muffins can be a bit denser, so keep an eye on the baking time.
How long do the muffins last?
These muffins stay fresh for about 3 days at room temperature. Store them in an airtight container to keep them moist. For longer storage, place them in the fridge for up to a week. You can also freeze them for up to 3 months. Just let them cool completely, then wrap them tightly before freezing.
In this blog post, we explored the key ingredients, mixing steps, and tips for perfect muffins. You learned how to prep the oven, combine wet and dry ingredients, and avoid overmixing. We shared fun variations and storage tips too.
Muffins can be simple and fun to make. Enjoy experimenting and personalizing your recipes. Happy bakin