Dive into the world of flavor with my Baked Coconut Shrimp! This crispy and flavorful delight is perfect for any meal or snack. With just a few simple ingredients and a straightforward process, you’ll impress your family and friends in no time. Whether you want to learn how to achieve that perfect crunch or explore delicious variations, I’ve got you covered. Let’s get cooking and bring the taste of the tropics to your kitchen!
Why I Love This Recipe
- Crispy Texture: The combination of panko breadcrumbs and shredded coconut creates an irresistible crunch that will have everyone coming back for more.
- Flavorful Seasoning: With the addition of garlic powder and paprika, these shrimp are packed with flavor, making them a standout appetizer.
- Healthy Alternative: Baking instead of frying keeps this dish light and healthy, allowing you to enjoy the deliciousness without the guilt.
- Versatile Serving Options: These coconut shrimp pair perfectly with a variety of dipping sauces, allowing for customization based on your taste preferences.
Ingredients
Shrimp Requirements
For this recipe, you need 1 pound of large shrimp. Make sure they are peeled and deveined. This step saves time and makes it easy to eat. Large shrimp work best for this dish. They hold up well during the coating and baking process.
Coating Ingredients
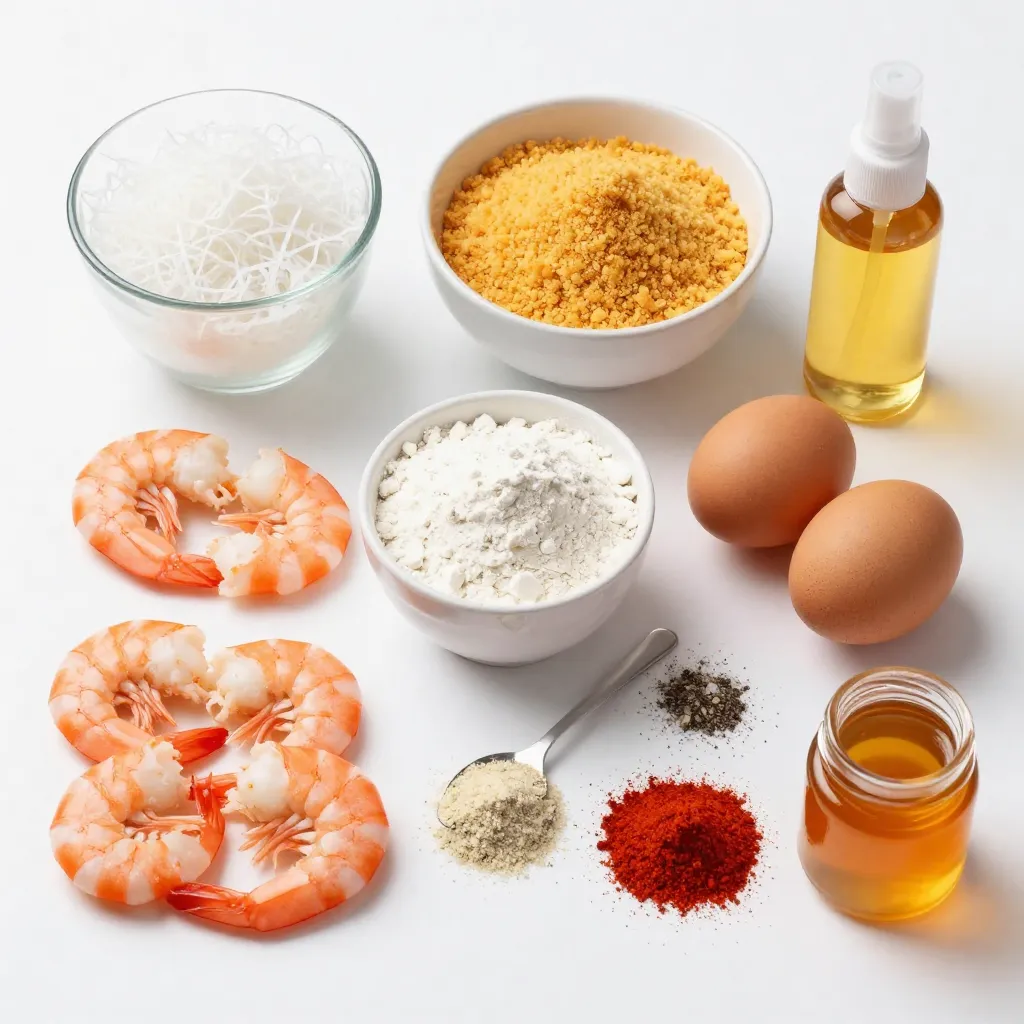
The coating gives the shrimp its crispy texture. You will need:
– 1 cup shredded coconut (you can use sweetened or unsweetened)
– 1/2 cup panko breadcrumbs
– 1/2 cup all-purpose flour
– 2 large eggs
– 1 teaspoon garlic powder
– 1 teaspoon paprika
– 1/2 teaspoon salt
– 1/4 teaspoon black pepper
Mix the panko, coconut, garlic powder, paprika, salt, and pepper in a bowl. This mixture adds flavor and crunch.
Optional Ingredients
If you want a touch of sweetness, add 1 tablespoon of honey to the egg mixture. This makes the shrimp even tastier. You can skip it if you prefer a more savory flavor. Cooking spray is also important. It helps the shrimp crisp up nicely in the oven.
Step-by-Step Instructions
Preparing the Baking Sheet
First, you need to prepare your baking sheet. Preheat your oven to 400°F (200°C). This step is key for a crispy outcome. Line your baking sheet with parchment paper to keep the shrimp from sticking. For added crispiness, lightly spray the parchment with cooking spray. This small step helps the shrimp get that nice golden color.
Coating the Shrimp
Now, let’s coat those shrimp. Start by mixing the panko breadcrumbs and shredded coconut in a shallow bowl. Add garlic powder, paprika, salt, and black pepper. Stir well to spread the flavors evenly. In another bowl, place the all-purpose flour. This will be the first dip for the shrimp. In a third bowl, whisk together the eggs and honey.
Take a piece of shrimp and dip it in the flour. Make sure it is fully coated, then shake off any extra flour. Next, dip the shrimp into the egg mixture. Let any excess egg drip off. Finally, coat the shrimp in the coconut-panko mix. Press gently to help it stick. Place the coated shrimp on your prepared baking sheet. Repeat this for all the shrimp until they are all coated.
Baking Process
It’s time to bake! Once your shrimp are on the sheet, lightly spray them with cooking spray. This helps them become crispy. Place the baking sheet in the preheated oven. Bake for 12 to 15 minutes. Keep an eye on them! You want the coconut to turn golden brown and the shrimp to cook through. When they are done, they will look and smell amazing!
Tips & Tricks
Achieving Crispiness
To make your baked coconut shrimp extra crispy, use panko breadcrumbs. These crumbs are light and airy, which helps create a crunchy texture. I recommend lightly spraying the shrimp with cooking spray before baking. This step adds a nice golden color and aids in crisping. Make sure your oven is preheated to 400°F (200°C) for the best results. Baking at the right temperature helps the shrimp cook evenly and stay crispy.
Flavor Enhancements
For a flavor boost, add spices to your coating mix. Garlic powder and paprika work wonders in this recipe. If you like a bit of heat, try adding cayenne pepper. You can also mix in some lime zest to brighten the flavors. For sweetness, consider drizzling honey over the shrimp before baking. This adds a nice caramelized touch.
Common Mistakes to Avoid
One common mistake is overcooking the shrimp. Keep an eye on them while they bake. Cooking them just until they turn pink will keep them tender. Another mistake is not pressing the coconut-panko mixture onto the shrimp. Press firmly to ensure it sticks well. Lastly, avoid overcrowding the baking sheet. Give each shrimp space to cook properly and crisp up.
Pro Tips
- Choose the Right Shrimp: Opt for large, fresh shrimp for the best texture and flavor. Frozen shrimp can also work, just ensure they are fully thawed and patted dry before coating.
- Coating Technique: For an even crispier texture, double dip the shrimp in the egg mixture and then the coconut-panko mixture to add an extra layer of crunch.
- Watch the Baking Time: Keep an eye on the shrimp while baking. Ovens vary, so check them a couple of minutes before the recommended time to avoid overcooking.
- Experiment with Flavors: Feel free to add spices like cayenne pepper or a splash of lime juice to the coconut-panko mixture for an extra kick of flavor.
Variations
Alternative Dipping Sauces
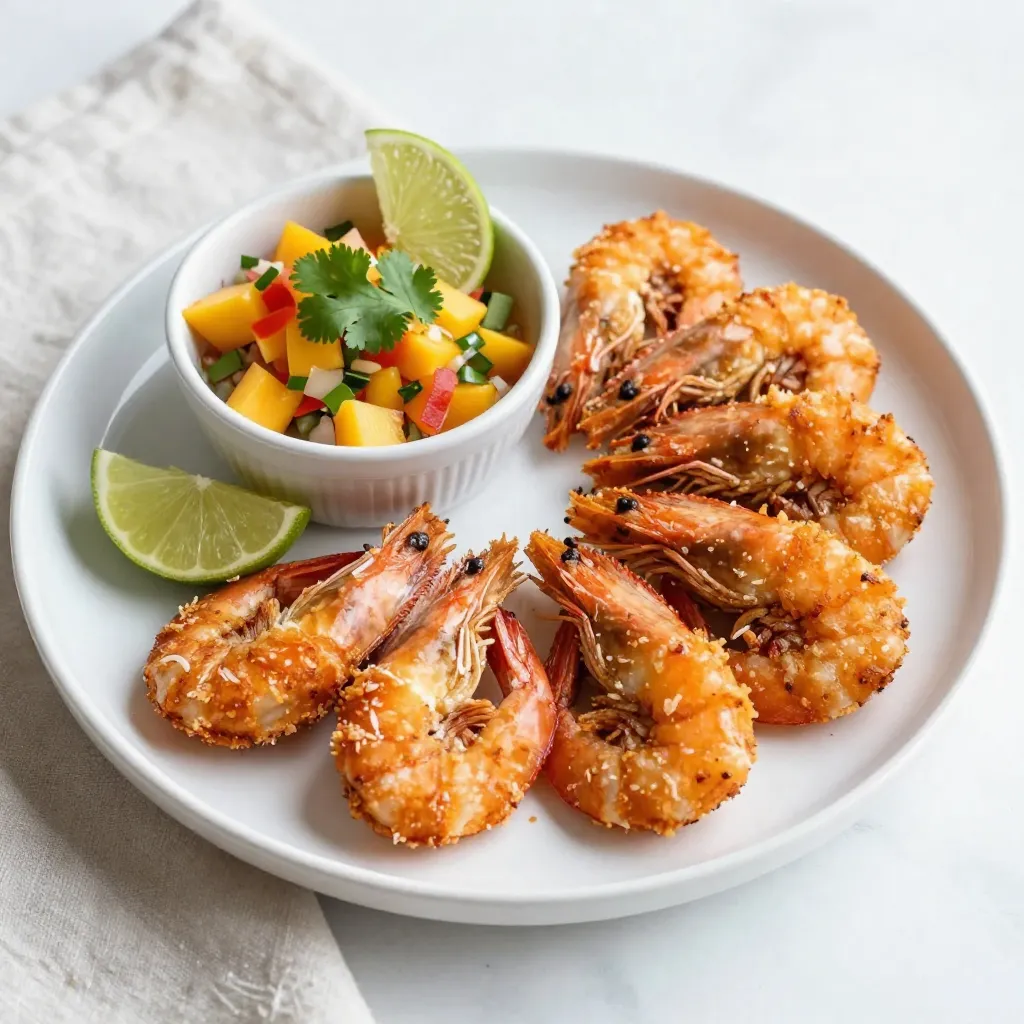
You can change the flavor with different sauces. For a tangy twist, try spicy mango salsa. Simply mix diced mango, red onion, jalapeño, and lime juice. For a sweet option, pair the shrimp with sweet chili sauce. The blend of sweet and spicy works great. You could also use a zesty yogurt dip. Just mix plain yogurt with lemon juice and fresh herbs. Each sauce adds a unique touch to your coconut shrimp.
Different Flavor Profiles
You can easily change the taste of baked coconut shrimp. Add spices like curry powder or cumin for a warm kick. For a tropical vibe, try adding lime zest or ginger. You can even use coconut milk in the egg wash for more coconut flavor. Don’t forget to play with your favorite herbs too. Fresh cilantro or parsley can brighten the dish. Each twist makes the shrimp special and fun.
Adjusting for Dietary Restrictions
If you have dietary needs, you can still enjoy baked coconut shrimp. For gluten-free options, swap out regular flour and breadcrumbs for gluten-free versions. Almond flour and crushed gluten-free crackers work well. If you are vegan, replace shrimp with cauliflower florets. Use a plant-based egg substitute, like flaxseed meal, to bind the coating. These changes keep the dish tasty while catering to your needs. Feel free to experiment and make it your own!
Storage Info
Refrigerating Leftovers
After you enjoy your baked coconut shrimp, store leftovers in the fridge. Put them in an airtight container. This keeps them fresh for up to three days. Ensure the shrimp cool down before sealing. This helps prevent moisture buildup. For best taste, eat them within two days.
Freezing Coconut Shrimp
You can also freeze the coconut shrimp for later. First, let them cool completely. Then, lay them on a baking sheet in a single layer. Freeze them for about one hour. This step prevents them from sticking together. After they are firm, transfer the shrimp to a freezer-safe bag. They can stay in the freezer for up to two months. Label the bag with the date, so you remember when you froze them.
Reheating Instructions
To reheat the shrimp, use your oven for the best results. Preheat your oven to 375°F (190°C). Place the shrimp on a baking sheet lined with parchment paper. Bake for about 8-10 minutes until they are warm and crispy. You can also use an air fryer set at 350°F (175°C) for about 5-7 minutes. Make sure to check that they are heated through before serving. Avoid using the microwave as it may make them soggy.
FAQs
Can I use frozen shrimp for this recipe?
Yes, you can use frozen shrimp. Just thaw them first. Place them in the fridge overnight or run cold water over them. Make sure they are peeled and deveined before you start. This way, they will soak up the flavors well.
How do I make baked coconut shrimp gluten-free?
To make this dish gluten-free, swap all-purpose flour and panko breadcrumbs for gluten-free versions. Look for gluten-free panko and flour at the store. This will keep your shrimp crispy and tasty without any gluten.
What should I serve with baked coconut shrimp?
Baked coconut shrimp pairs well with a variety of sides. You can serve them with a fresh salad, rice, or even fries. Dipping sauces like sweet chili or spicy mango salsa add extra flavor. Garnish with lime wedges or fresh herbs for a nice touch.
This article covers how to make baked coconut shrimp. You learned about key ingredients, like shrimp and coating elements. I shared steps for preparation, coating, and baking. You also found tips for crispiness and flavor. Additionally, I provided storage tips and FAQs for common concerns.
Remember, making this dish is easy and fun. Try different sauces or seasonings for your taste. With these guidelines, you can enjoy delicious coconut shrimp anytim